Changing DNS in Windows 10
DNS (Domain Name Server) is very important for the proper functioning of the network. This service "translates" from a text address, e.g. www.hukot.net, which we understand, to a numerical address, e.g. 51.254.238.67, which computers understand, and vice versa.
One of the possible reasons why you often fail to access websites is a DNS failure at your Internet provider. We can test whether there is an outage or not as follows.
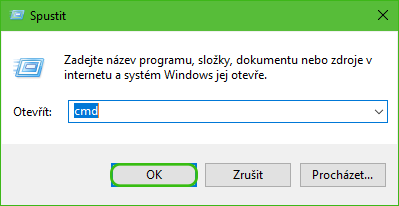
Right-click on the start menu and look for the Run option in the list.
Enter cmd and click OK.
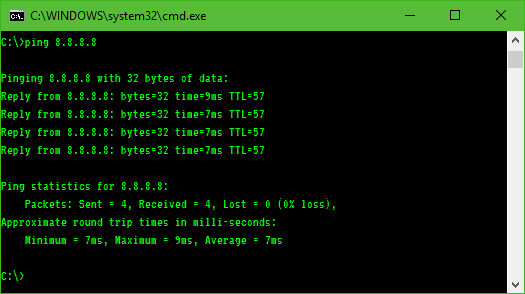
A command prompt will open.
Use the ping command to test whether our network is communicating with the rest of the world.
In our case, we will ping the address 8.8.8.8
If the ping command responds to us but the website does not load, the DNS servers at your Internet provider are probably down. The solution to this problem is very simple. Just change the current DNS. We can choose from public DNS servers, for example:
| Provider | IP Address | Alternative IP Address |
|---|---|---|
| 8.8.8.8 | 8.8.4.4 | |
| Level3 | 209.244.0.3 | 209.244.0.4 |
| FreeDNS | 37.235.1.174 | 37.235.1.177 |
The procedure is very comfortable.
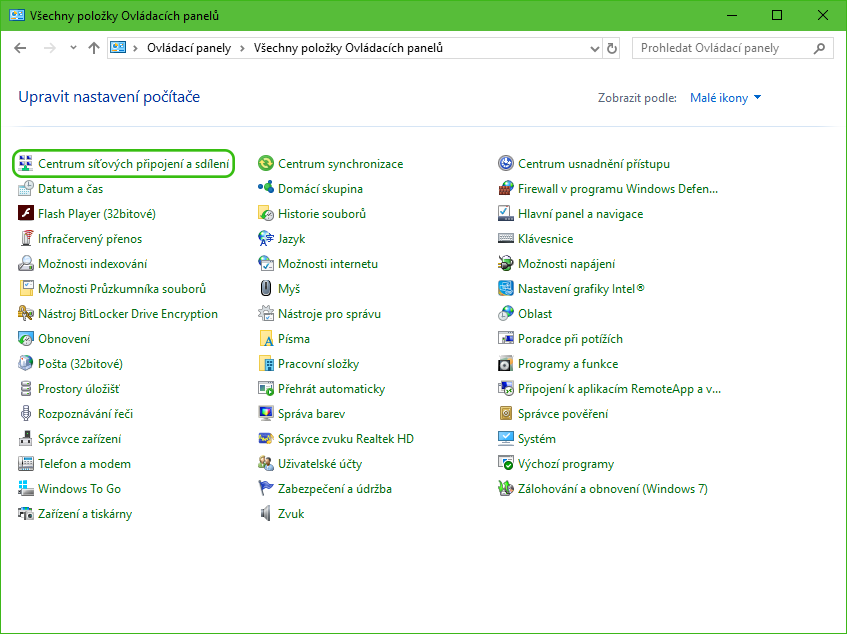
We open the Control Panel and in the upper right corner is the text View by.
If you do not have the option Small icons selected here, click the list and select the option.

In the list of options, select Network Connections and Sharing Center.
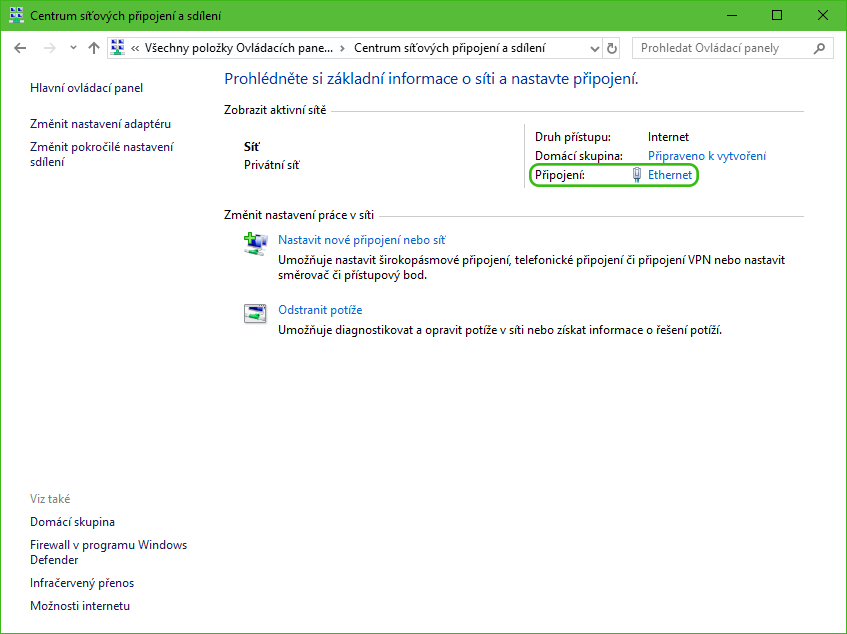
In the list of active networks, select the network through which you connect to the Internet.
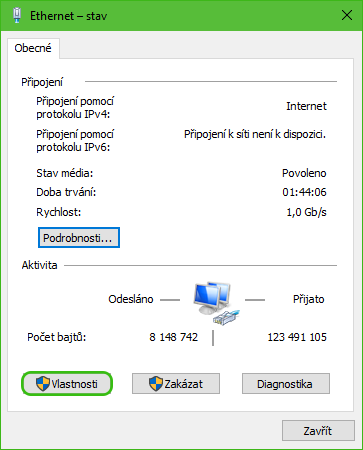
Click on the name of the connection in the right column.
Select Properties.
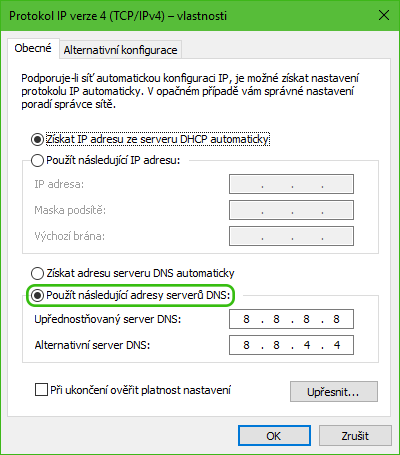
Select the IP version 4 protocol (TCP/IPv4) option and click Properties.

We mark the Use the following DNS server addresses option and now fill in the IP addresses of the selected DNS servers in the active fields Preferred DNS server and Alternate DNS server.
Click "OK" to save.