How to configure a network connection in Windows Server 2016
After ordering, you will receive a VPS with the Windows Server 2016 operating system. Among the basic settings of Windows Server 2016 is an active network connection via a so-called DHCP server, which configures the IP address automatically. For our purposes, we need to set the IP address manually. Therefore, in a short guide, we will show you how to do it.
1. Logging into Administration
We log into the administration of hosting services admin.hukot.net.
2. Determining the IP Address
After logging in, we see the navigation. We select the Virtual Servers option.
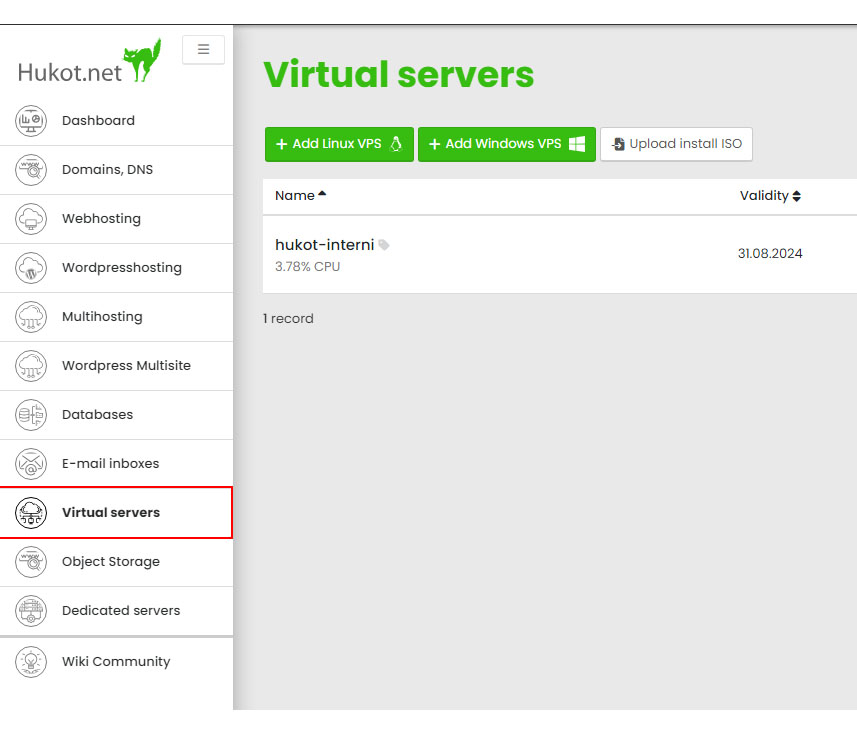
Here, we see an overview of available VPS. For a specific VPS, we click on the displayed IP address.
After clicking, a popup window with the complete IP address settings will appear.

We will use these details later.
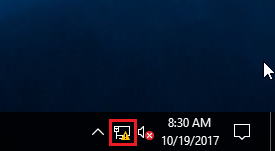
2. VPS Configuration
Now, we go to VPS. Right-click on the Network icon.
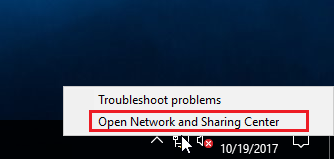
Select the option Open Network and Sharing Center.
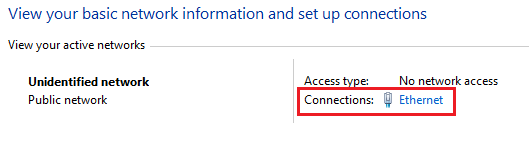
Select Connections: Ethernet Network.
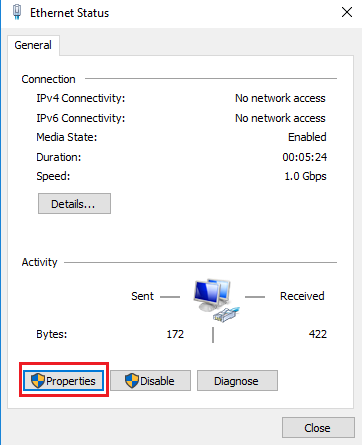
Choose Properties.
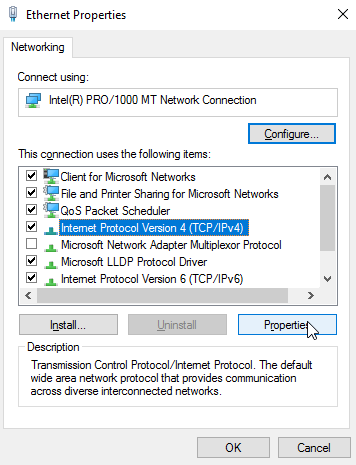
Select Internet Protocol Version 4 (TCP/IPv4) > Properties.
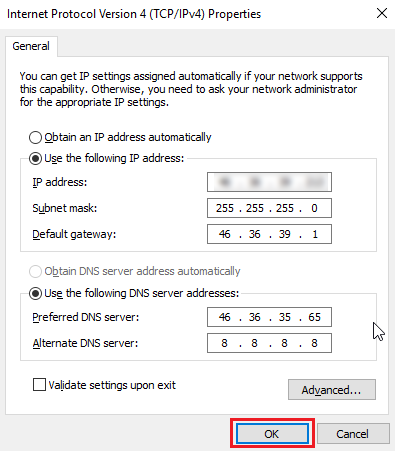
Select the second option Use the following IP address.
Fill in according to the template, your details we found in step 1. Where
- IP address is IP
- Subnet mask is Mask
- Default gateway is Gateway
- Preferred DNS server is DNS1
- Alternate DNS server is DNS2
Confirm and close.
Done (^.^)